As an Amazon Associate, we earn from qualifying purchases. Some links on this site are affiliate links at no extra cost to you. Our recommendations are based on thorough research and editorial judgment.

How to Hold a Training Leash Properly

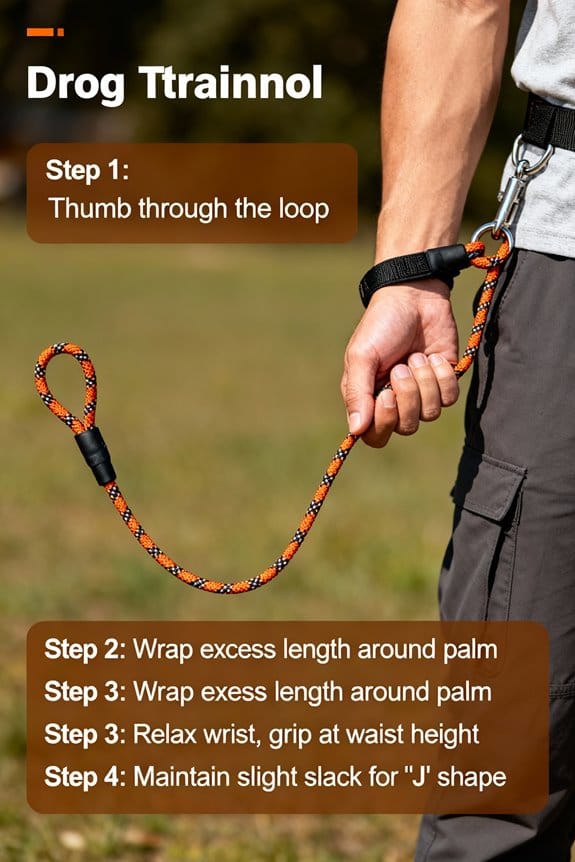
Handlers should not wrap the leash around the hand, because it causes strain, reduces dexterity, and impairs corrections. Use a fingerlock by looping the leash around the index finger and closing the fist, this gives a secure anchor. Or use a thumblock, wrapping the leash around the thumb and draping it into the palm for stability and adjustments. Anchor the free hand at belly‑button level, keep a 30–45 cm U, and practice drills. Tips follow.
Key Takeaways
- Never wrap the leash around your hand; use grips that avoid strain and allow quick release and adjustments.
- Use the Fingerlock method to loop the leash around your index finger for a secure, strong, releasable hold.
- Try the Thumblock grip by draping the leash around your thumb and palm for enhanced stability and fine length control.
- Anchor the leash at belly-button level (Far) for leverage, then practice Close anchor for precise wrist cues.
- Keep a relaxed U-shaped leash (30–45 cm slack), choose properly fitted gear, and practice short grip drills with treats.
Why Wrapping the Leash Harms Your Control and Hands
You may be interested


Many handlers wrap the leash around a hand or wrist, believing it offers extra control during sudden pulls or lunges. This practice increases strain on fingers and palm, causing crushing, bruising, and potential soft tissue injury during strong tugs. Sensitivity and dexterity decline when the line is wrapped, reducing the ability to execute quick leash flicks and directional guides precisely during sudden corrective cues. Handlers encounter practical hindrances, for example retrieving a phone or opening doors becomes awkward, reducing overall efficiency and balance. Does wrapping reduce frustration tolerance, because limited hand mobility prevents subtle corrections, which then escalate into larger problems? Instead, handlers are advised to adopt alternatives such as thumb lock or other secure holds, which preserve hand health, comfort, and daily control. Durable materials like rock-climbing rope or reinforced nylon enhance the longevity and safety of leashes, making them preferable for maintaining control without compromising hand comfort.
Recommended Products

COMFORTABLE FIT FOR ALL BREEDS: Designed for dogs 15+ lbs with adjustable neck sizes from 10–26 inches, this lightweight professional remote training collar provides a secure, comfortable fit for long wear, ensuring effective and stress-free training sessions.

4-in-1 Multifunctional Double-Decker Design – Fits 2–4 cats or 2 small dogs with a bottom TSA-approved expandable carrier (18″ × 11″ × 11″, comfort load 15 lbs) and a spacious top crate (22.8″L × 14.5″W × 21.6″H, comfort load 33 lbs). An all-in-one solution as a pet stroller, portable dog crate, airline-approved cat carrier, or cozy indoor/outdoor pet house.

DESIGNED FOR: The Army Leather Heli Ski was designed for freeriders, professional mountain guides and patrollers, ski instructors and others who place high demands on function, fit and durability
The Fingerlock Method Explained
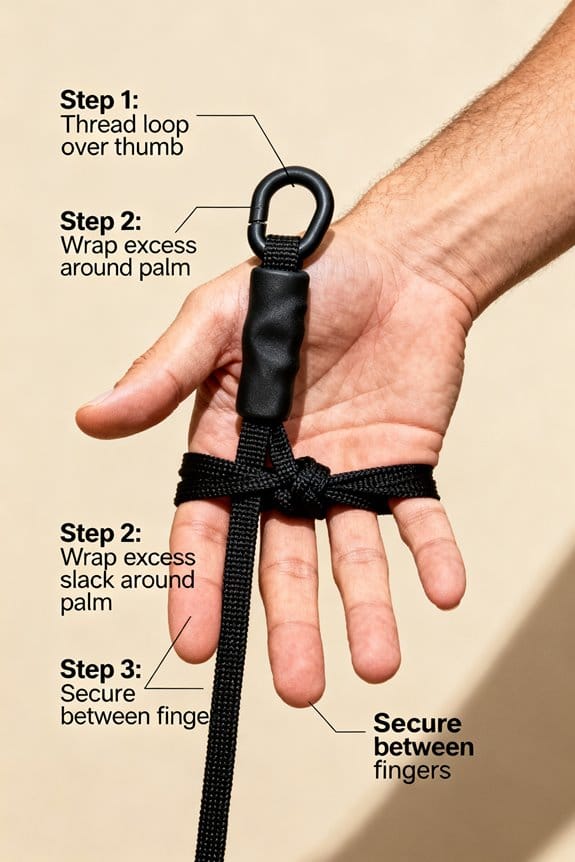
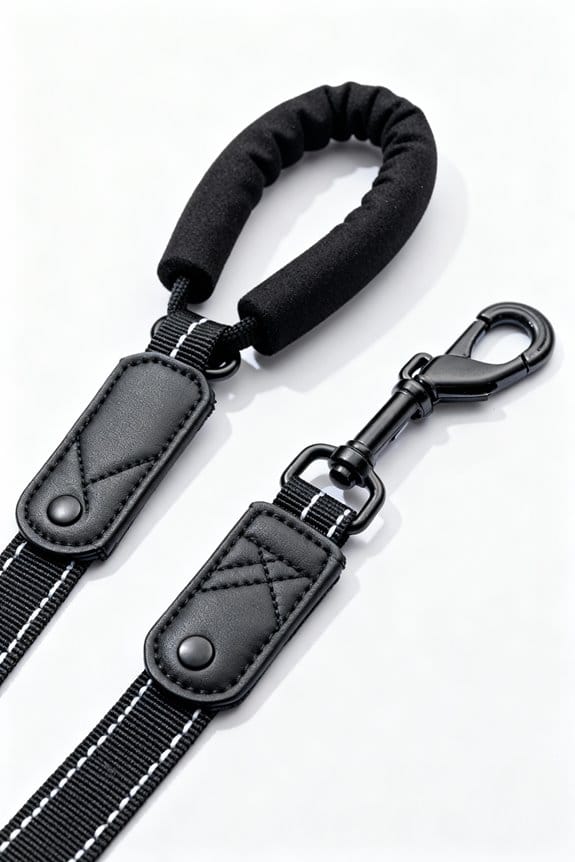
Looping the leash once around the index finger, the Fingerlock method creates a secure anchor that preserves grip strength while allowing a closed fist. The handler places one wrap, positions the leash between finger and palm, holds the slack with remaining fingers, enabling quick adjustments over distances such as two to ten feet. Why choose this technique instead of wrapping fully around the hand? Because it reduces pressure points, it prevents entanglement, and it allows immediate release if needed. It works with short leashes, traffic loops, and when a treat pouch is used for training, offering consistent feedback. Beginners should practice tugs and controlled holds, repeating ten to twenty short sessions, to build reliability and reduce mistakes. The approach promotes safer, efficient walks daily. When selecting a leash for training, consider those with padded handles and reinforced stitching for enhanced durability and comfort.
Recommended Products


HOME GYM EQUIPMENT: TRX’s PRO3 Suspension Trainer System helps you create intense full-body training anytime, anywhere. The PRO3 resistance training system is used by professional trainers, pro athletes, Olympians, fitness pros, and gyms worldwide.

Quench your thirst for adrenaline with a hard-pulling, two-line speed demon that’ll pull you down the beach when the wind comes up
How to Perform the Thumblock Grip
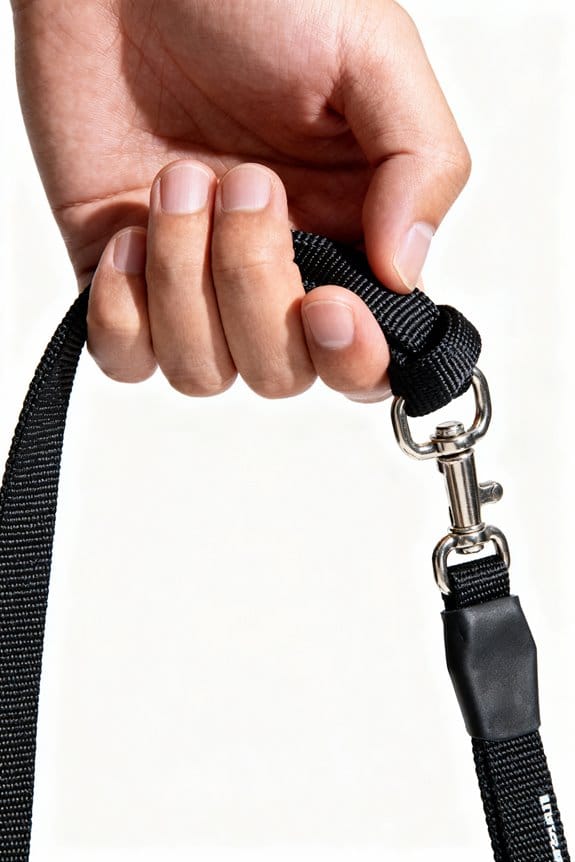
After practicing the Fingerlock for controlled holds, handlers often try the Thumblock to increase thumb leverage and stability. The method loops the leash around the thumb while the palm drapes over the line, creating a T-bar effect that locks pressure across the top. Keeping all parts of the leash within the fist prevents slips, and provides easy access for quick adjustments when needed. This grip increases grip strength without discomfort, it allows precise changes in leash length, useful during recalls and tight turns. Handlers should practice with short and long leashes, for five to ten minutes each, to build comfort and consistency. When applied correctly, the Thumblock offers dependable control, and supports responsive handling across varied walking scenarios, for both novice and experienced handlers. For optimal effectiveness, handlers are encouraged to pair the Thumblock grip with Halti Training Leash as it complements the control and guidance needed during training.
Recommended Products

ELASTIC SHOCK ABSORPTION: Our heavy duty dog leash features a fully elastic construction that stretches along its entire length to absorb sudden pulling forces. This waist dog leash helps reduce strain on both dog and handler while creating a smoother and more comfortable experience during running, hiking, canicross, and other outdoor activities.

UNIQUE & INNOVATIVE WRAP-AROUND TECHNOLOGY – When your dog walks calmly, the leash stays slack with no pressure. The moment they pull, the loop gently tightens around the chest and underbelly, creating instant feedback that clearly communicates pulling doesn’t work. This natural cause-and-effect helps dogs quickly teach themselves to walk calmly, making training easier and walks more enjoyable.

𝐒𝐓𝐄𝐏 𝐁𝐘 𝐒𝐓𝐄𝐏 𝐓𝐑𝐀𝐍𝐒𝐅𝐎𝐑𝐌𝐀𝐓𝐈𝐎𝐍: Modular 3-in-1 Stick Leash offers an easy training solution. Step 1: Use the control stick to stop pulling and establish calm walking with your dog leash for large dogs. Step 2: Detach the stick and use the short handle for heel training, reinforcing calm walking. Step 3: Convert to a premium everyday leash once your dog masters loose-leash walking. Our system transitions from dog leashes for medium dogs to comfortable walking and hands free dog leash mode.
Choosing Between Fingerlock and Thumblock
How should a handler choose between Fingerlock and Thumblock, when both offer reliable control but different leverage? The handler should test both methods, using 10-15 minute sessions per walk, to compare comfort, sensitivity, and control. Fingerlock loops around the index finger, increasing dynamic reach for short corrections, useful with quick-reacting dogs and agile breeds. Thumblock forms a T-bar with the thumb, keeping the leash within the fist, providing consistent pressure for larger, steady pulls from strong dogs. Both require maintaining a u-shape of the leash, for clear communication and predictable deceleration. If response time matters, choose the method that yields faster feedback during practice, otherwise prioritize fatigue reduction over long walks. Regular practice, across varied speeds and terrains, reveals which grip proves most effective. Remember that quick-release buckles on your dog’s harness can make on-and-off application easier, especially when testing different leash grips.
Recommended Products

ADJUSTABLE FIT HANDS-FREE DOG RUNNING & TRAINING LEASH - The EzyDog Handy 15 Leash fits around the hand for hands-free walking. Fully adjustable, the glove section opens out to fit any size hand and is the perfect addition to turn any leash into a hands-free leash.

Hands Free Dog Leash - Our hands free leash for dogs wraps comfortably under one arm, over the other and rests comfortably across your chest, allowing you to maintain full mobility and control while keeping your hands free for other tasks

3-Foot, 42-Inch & 4-Foot Come with a brass o-ring in the handle
Proper Anchor Hand Placement: Far Anchor
When choosing between Fingerlock and Thumblock, handlers should also consider the Far anchor hand, positioned at the belly button for leverage. The Far anchor, placed at the navel level, offers a stable base for holding the leash during walks of 5–60 minutes, and it reduces hand strain by distributing force across the core. How does this assist in training? By allowing adjustments of 1–3 feet of slack without losing control, the handler can reinforce cues while maintaining safety. For novice dogs, the Far anchor supports broader cues and clear boundaries; for advanced dogs, it frees the Close hand for subtle signals. Proper placement minimizes injuries, improves responsiveness during sudden pulls, and creates consistent communication, so handlers maintain authority and protect their hands as intended. Establishing a consistent reward system helps reinforce positive behavior during leash training, enhancing the dog’s learning experience and strengthening the bond between the pet and owner.
Transitioning to the Close Anchor for Precision
Although the handler has used a Far anchor for broader control, shifting to the Close anchor brings sharper leash signals, improved timing, and finer communication. The shift positions the anchor hand near the belly button, about six to eight inches from the torso, increasing responsiveness, reducing arm swing. How small should wrist movements be, one asks; two to three inches of motion often conveys clear cues without overcorrection. This Close anchor permits precise adjustments for sudden direction changes, loose-leash walking, and heel work, so the handler can correct quickly while maintaining balance. Padded handles increase comfort during extended use, which is essential for maintaining control without straining the user’s hands. Regular practice, ten minutes, three times daily, builds consistency and confidence. As the dog’s skill improves, refined coordination strengthens the bond, because clearer signals reduce confusion and reinforce desired behavior and retention.
Leash Shape and Tension: Maintaining the U-Shape
Handler’s hand should maintain a U-shaped leash, positioned between the dog and the body, allowing immediate, nuanced communication and reduced pulling. The handler keeps the leash shape loose during relaxed walks, at roughly 30–45 centimeters of slack, but raises the U to chest height when tighter control is needed, for example crossing a busy street. Why is this adjustment important? Because a proper U absorbs sudden lunges, decreases tension spikes, and reduces joint strain for both parties. The handler monitors posture and environment constantly, adjusts U height and tension within seconds, and prevents accidents proactively. Regular reassessment every 5–10 minutes or when behavior changes maintains consistent feedback, ensuring clear, immediate cues without excessive force. Handlers should practice shifts, using varied scenarios for consistent skill. Remember to choose leashes with reflective stitching for added safety during night walks.
Equipment Choices That Affect Leash Handling
Equipment choice directly shapes control and safety on walks, influencing communication, comfort, and injury risk for both dog and handler. Selecting a martingale collar for a polite, non-pulling dog provides quick correction without choking, while a front-clip harness suits a dog that pulls consistently. How should energy level influence selection, low, moderate, or high activity dogs; choose light harnesses for calm dogs and reinforced, padded models for high-energy breeds. Proper fit prevents slips and escapes, measure neck and girth, allow two fingers between collar and skin. Handlers reduce hand strain with shock-absorbing leashes or shorter 4-6 foot leads. Regularly reassess gear as behavior and dog training progress to maintain effective leash handling. Choose equipment based on scenarios, puppies, seniors, large breeds, or small companions.
Recommended Products

Type:Martingale Collars for Dogs, Dog Size:xSmall, Small, Medium, Large, xLarge, Model:Dog Training Collar, Sizes:10 to 16 Inch - 14 to 20 Inch - 18 to 26, Bundle Listing:No

Type:Collar, Brand:Guardian Gear, Country/Region Of Manufacture:Unknown, Colors:Red, Blue, Pink, Purple, Black, Dog Breed:All

The information below is per-pack only
Using Treats to Smooth Leash Application
After selecting appropriate gear for a dog’s energy level and fit, trainers often use food to smooth the moment of leash attachment and reduce resistance. They drop small treats on the floor near the dog to distract and encourage calm behavior before the walk begins, which lowers tension. Why use lickable options like peanut butter or squeeze cheese, when dogs focus longer and leash fastening becomes smoother? A trainer wears a treat pouch for immediate access to treats, enabling quick reinforcement within one to two seconds of calm behavior. Precise timing matters, distribute rewards immediately after the dog looks up or sits, and strength of association increases with consistency. Consistent reward practice over ten to twenty sessions builds reliable, calm response at leash application. Additionally, using non-slip, cushioned surfaces during leash training can help maintain a dog’s focus and balance, enhancing the overall training experience.
Common Handling Mistakes and How to Fix Them
When trainers wrap the leash around a hand, what risks arise for both handler and dog, and how can they be avoided? Wrapping can cause hand injuries, reduce dexterity, and diminish control, so make sure handlers adopt safer grips such as the Fingerlock, looping the leash around the index finger for secure, dynamic length management. Alternatively, the Thumblock creates a T-bar with the thumb, keeping leash within the fist for predictable handling. Beginners should use a Far anchor at the belly button for stability, then shift to a Close anchor as the dog becomes trained, enabling finer wrist adjustments. Regularly assess the grip, maintain a U-shape between hand and dog, and inspect for wear, because these steps prevent accidents and improve clear communication skills. A no-pull design can redistribute pressure away from the throat, providing a safer experience for dogs that lunge or pull.
Practical Drills to Build Reliable Leash Skills
Practice the basic grips in short, focused sessions, repeating each drill for two to five minutes to build muscle memory. Begin with the Fingerlock, loop around the index finger, make a fist, this secures a comfortable, dynamic grip for directional cues. Try the Thumblock by wrapping the leash around the thumb with the palm over it, forming a T-bar that contains the leash in the fist. Place one hand at the belly button for a Far anchor during early training, then shift to a Close anchor for precise communication as skills improve. Keep the leash in a u-shape consistently, which preserves sensitivity and allows quick, calibrated responses. For giant breed dogs, consider using XL orthopedic beds to ensure they have adequate support and comfort, which can be crucial for their joint health. Use treats on a schedule to reward correct behavior, thereby increasing focus and reinforcing leash manners daily.
Frequently Asked Questions
How to Hold a Leash When Training a Dog?
They hold the leash using proper Leash Techniques: Fingerlock or Thumblock, keeping slack in a U-shape, all leash parts inside the fist, switching from Far anchor at the belly to Close anchor as training progresses.
What Is the 3 Second Rule for Dogs?
75% of owners report losing focus; the 3 second rule for dogs is redirecting attention within three seconds to prevent distraction, emphasizing Leash Timing so the handler immediately reasserts control, reinforces behavior, and prevents escalation.
How to Properly Hold a Lead?
Handler holds lead using Leash Techniques: employ Fingerlock or Thumblock, keep a relaxed U-shape, avoid wrapping around hand, monitor grip, use Far-to-Close anchoring as training advances for secure, responsive control and better communication.
What Is the 123 Method for Dogs?
Simple yet precise, the 123 Method for dogs is a Dog Training framework: 1) give a cue, 2) reward immediately, 3) redirect if needed; it promotes consistency, clear communication, and adjustment to reinforce desired behaviors.
Conclusion
Readers compare the fingerlock and thumblock grips, practicing each ten minutes at distances of one to three feet. Which grip provides better control when a dog lunges unexpectedly, and which reduces hand strain after long walks? Use the far anchor on the hip for steady pressure, switching to a short five-inch handhold for quick corrections. Mastery is like tuning an instrument—consistent, regular drills, three to five repetitions per session, yield smoother handling and safer outings.