As an Amazon Associate, we earn from qualifying purchases. Some links on this site are affiliate links at no extra cost to you. Our recommendations are based on thorough research and editorial judgment.
ID Tag Placement on Training Collars
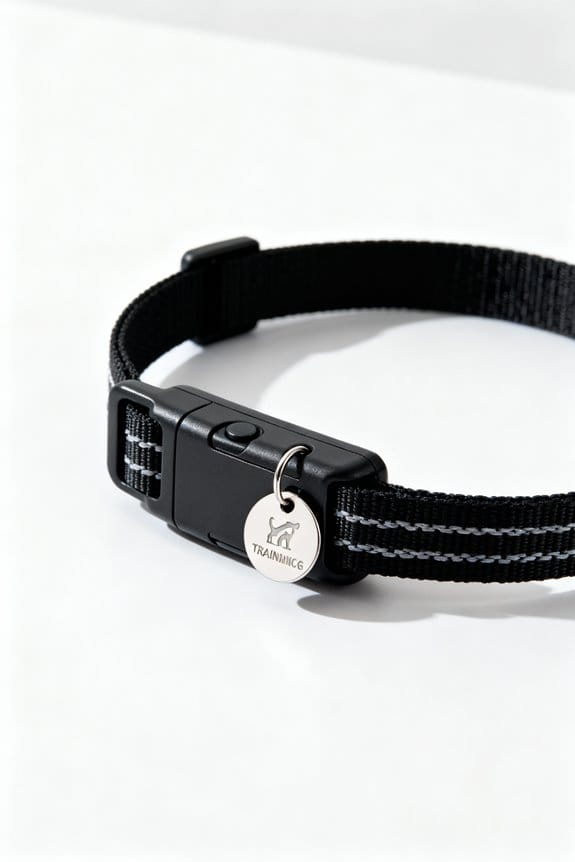
ID nameplates should sit two to three inches behind the ears, aligned with the primary buckle, to stay visible and reduce tag noise. Which placement best balances accessibility and silence, tag on the pull collar or welded plate? Use stainless steel or engraved aluminum, secure with two rivets or welded mounts, centering the plate. Layer collars with prong nearest the ears, e-collar next, pull collar last, and follow guidance on installation, durability, and regular inspection.
Key Takeaways
- Place ID tags visibly but unobtrusively near the top of the collar, 2–3 inches from the ears for quick contact access.
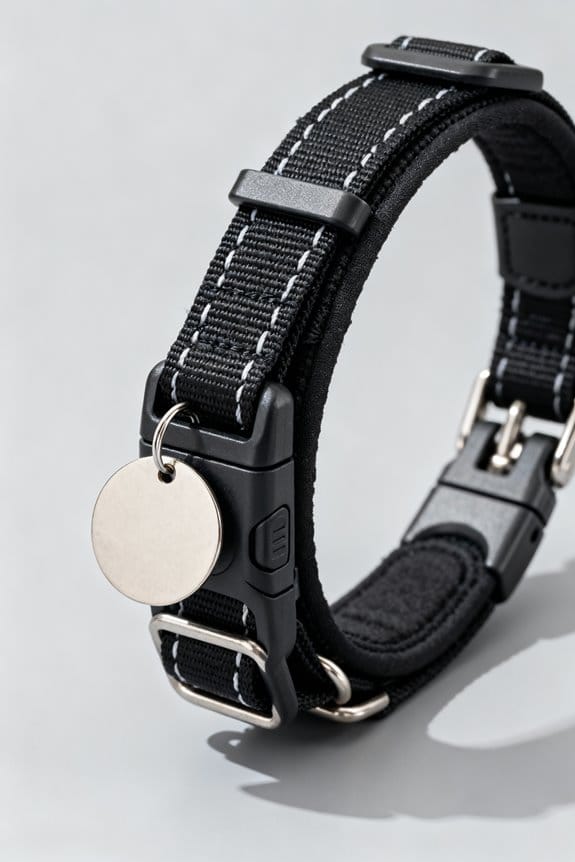
- Align the nameplate with the primary buckle or clasp to maximize visibility and ease of reading.
- Mount tags on the pull collar so they’re accessible during checks and do not interfere with prong or e-collars.
- Use durable materials (stainless steel or engraved aluminum) and secure nameplates with two rivets or welded mounts.
- Choose soundproof or lightweight tag designs to minimize noise and avoid distracting or discomforting the dog.
Why Proper ID Placement Matters for Training Collars
You may be interested
Because a collar often serves both control and identification functions, handlers should place ID tags where they remain visible yet unobtrusive. Proper placement guarantees owner contact information is accessible quickly, and it reduces tag noise that can distract during training. Should tags be located on the pull collar or on an adjacent ring, handlers must consider security versus accessibility, with two common scenarios. When mounted on the pull collar, tags remain secure, they seldom interfere with e-collars or prong collars, for example one to two tags fit easily. Regularly checking fit and functionality, monthly or before sessions, preserves clear communication and reinforces training goals. Is easy installation a priority, because quick attachment reduces handling time and promotes consistent placement across dog collars, aiding return? To prevent overstimulation during training, it’s important to consider supervision to prevent injuries, as mentioned in flirt pole activities.
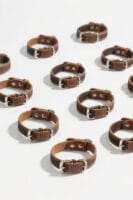
Ideal Positioning: Where the Nameplate Should Sit
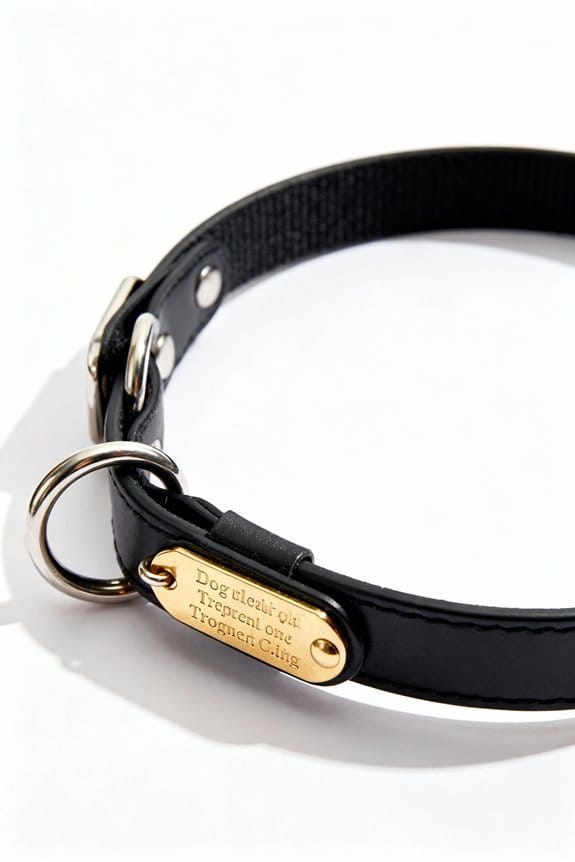
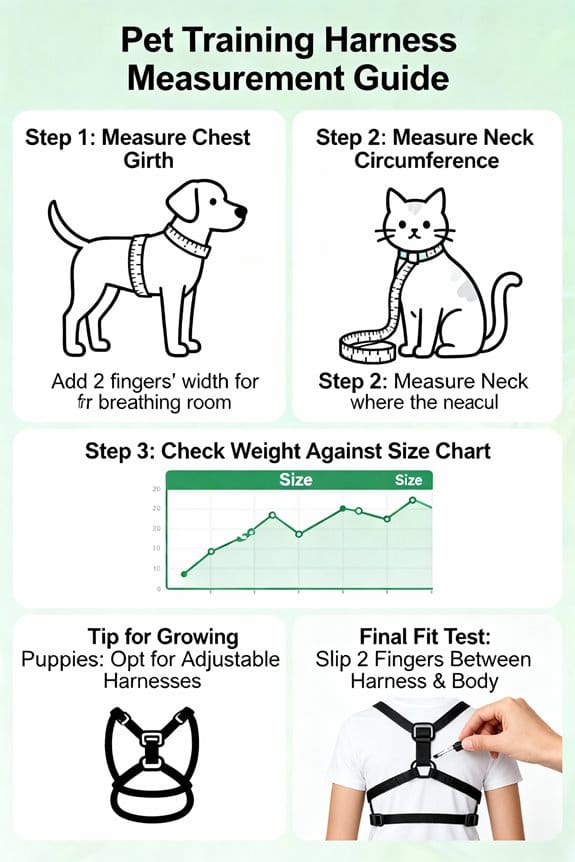
Although the nameplate should sit where it is easily visible, it should remain unobtrusive, typically on the outward-facing side of the collar. Placing it near the top, within 2 to 3 inches of the ears, keeps text readable while reducing snag risk during play, training, or hiking. How should one balance visibility and safety? Aligning the nameplate with the primary buckle or clasp creates a tidy profile, improves collar visibility, and simplifies identification for handlers and passersby. Use durable materials, such as stainless steel or engraved aluminum, to guarantee nameplate durability for years and varied weather. Ascertain secure attachment with two rivets or a welded mount, check it after vigorous sessions, and replace loose fasteners promptly to avoid losing essential identification information immediately thereafter. It is crucial to measure the dog’s neck size accurately when selecting training collars, as proper fit is vital for both effectiveness and safety.
Recommended Products
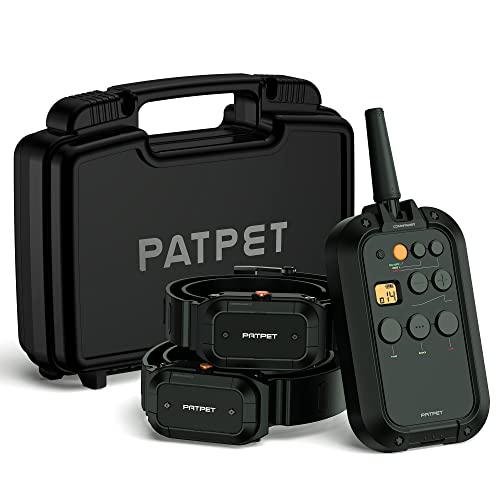
Dog training collar for 2 dogs. With 2 flexible channels convenient to train 2 dogs at the same time, 3 training modes, vibration, tone, and shock modes allow you to reinforce commands and correct misbehavior

Veteran-Designed Excellence: The INVIROX Ultra K9 Dog Training Collar provides 124 levels for precise control over reactive, stubborn, or hard-to-train dogs. Engineered by veterans, it allows you to tailor stimulation to your dog's unique temperament, unlike typical collars with limited settings

3 MODES WITH 16 LEVELS: Use the vibration or static correction modes with 16 different adjustable levels to find the perfect setting for your dog. Plus, this dog training collar with remote is equipped with a beep sound to condition your dog into not needing vibration or static correction!
Layering Multiple Collars: Order and Function
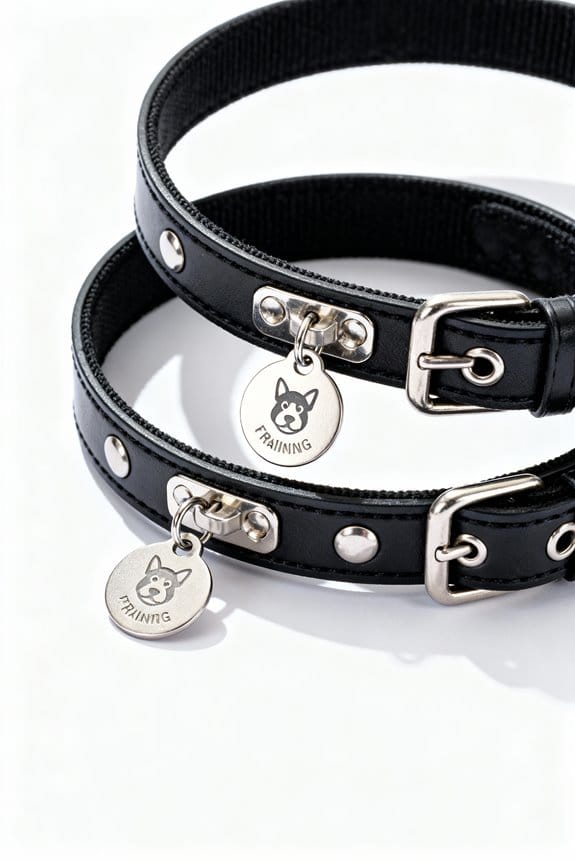
Arrange multiple collars in a clear hierarchy, placing the prong collar nearest the ears, then the e-collar, and finally the pull collar. This order emphasizes prong collar benefits for immediate communication, it positions corrective contact where sensory input is clearest and most direct. The e-collar effectiveness follows, set about one to two inches below the prong, allowing remote cues without interfering with tags. The pull collar purpose is distinct, carrying rabies, contact, and medical tags, remaining accessible for handlers and veterinarians during checks. What scenarios justify triple layering, everyday walks, structured training sessions, or veterinary visits? Confirm each collar fits snugly yet comfortably, check for two-finger spacing, inspect weekly for chafing and proper function. Conduct monthly equipment audits, document any issues. Reflective elements in dog harnesses improve visibility during nighttime walks.
Attaching Rivet-On Nameplates: Step-by-Step Considerations
Begin by marking the rivet hole positions precisely on the collar, ensuring the nameplate will sit centered and aligned with hardware. Next, choose rivet materials selection based on collar substance, for example brass for leather, stainless steel for nylon, or aluminum for lightweight use. Which installation tools are appropriate, a hammer and punch, leather punch, or drill, all used on a stable surface to avoid damage? For nylon collars, burn the hole edges lightly to prevent fraying, creating a clean, smooth finish before post insertion. Insert rivet posts from the backside, verify a snug fit, then tap caps with a hammer until they flatten completely. Finally, check alignment techniques by confirming the plate sits flush, secure, and safe for long term wear properly. When selecting a leash for a small dog, consider durable, high-strength materials like nylon or rope for enhanced safety.
Recommended Products

Officially Licensed Product – Authentic, officially licensed design that guarantees quality, accuracy, and brand integrity.

Officially Licensed Product – Authentic, officially licensed design that guarantees quality, accuracy, and brand integrity.

Officially Licensed Product – Authentic, officially licensed design that guarantees quality, accuracy, and brand integrity.
Choosing Durable Tags and Soundproof Options
Several durable materials, such as stainless steel and heavy-duty acrylic, offer resilience for training collars and resist damage from active play. Select soundproof options when dogs are noise-sensitive, as silent tags reduce distractions and improve focus during sessions. Choose higher-quality soundproof models because they resist wear, maintain silence, and keep attachments secure to prevent loss. Prefer rounded edges to avoid snagging on equipment, which reduces injury risk and collar damage over time. Consider lightweight designs to minimize pulling and neck discomfort during vigorous activity and long training periods. What size and attachment method suits the dog’s activity level and coat type, and how will it perform under wet conditions? Test tags under real conditions, then replace worn pieces promptly to guarantee safety and reliability. Reflective martingale collars enhance low-light visibility, ensuring safety during nighttime walks.
Recommended Products

Laser-engraved pet ID tag: Customize this dog name tag with your pet's name, medical info, your phone number or multiple contact numbers, your address, and a personal message in case your pet gets lost. Our Dog ID tags are laser-engraved to ensure the text is clear, easy to read, and won't fade over time.

Sufficient Quantity: Each pack contains 100 stainless steel dog tags to meet your decorative needs, so that you can use, replace the process more easily, you can also share with your friends, enjoy the joy

✿Blank shiny dog tags: Quantity 100.
Integrating GPS Trackers and AirTag Holders Safely
Where should a GPS tracker or AirTag holder sit on a training collar to keep it secure yet comfortable during active use? Place the device toward the back of the neck, over the spine area, where pressure is minimal and movement causes less rubbing. Secure attachment prevents loss during play, and regular inspections reduce detachment risk caused by wear and tear. Choose holders with IPX8 waterproof options for wet conditions, and verify AirTag compatibility and fit across collar widths, including 1 to 2 inch straps. Use reflective or brightly colored cases to improve visibility in low light, and avoid interfering with buckles or training hardware, because interference can reduce function and cause discomfort during energetic outdoor activities. Inspect fastenings monthly, or after heavy sessions. It is important to consider size compatibility when selecting collars to ensure they fit properly and remain comfortable for different dog breeds.
Recommended Products

Real-Time GPS Tracking--Track your dog every 3 seconds up to 3.5 miles. Works entirely via GPS — no phone, no network, no monthly fees. Tip: Best results with a clear line-of-sight to satellites; dense forests, buildings, or indoor spaces may temporarily affect accuracy.

💳 SUBSCRIPTION REQUIRED - The GPS tracker comes with a SIM card (provided). Therefore, a subscription is needed to cover the service charges. Available subscriptions (starting from $5.56 per month) include: monthly subscription, 1-year prepaid subscription, 3-year prepaid subscription.

COVER BUNDLE: This bundle includes one Tractive GPS Tracker in Mint with one Pink cover.
Managing Rabies, License, and Medical Tags on Training Collars
After placing GPS or AirTag holders toward the back of the neck, attention should shift to the pull collar’s role for tags. The pull collar occupies third position, it holds rabies, license, and medical tags so handlers read them without confusion while training. Which tag material options balance durability, noise reduction, and legibility for long-term use, consistently? Include multiple phone numbers, a secondary contact, and essential medical notes on tags, because emergency contact details speed reunification and guide responders. Use a soundproof tag for noise-sensitive dogs, this minimizes distraction while preserving information and guarantees readability, aiding handlers, shelters, and first responders. Inspect tag placement weekly, making sure tags do not obstruct hardware or interfere with commands, which supports effective identification strategies and maintains safety. Pealess dog whistles deliver consistent 110-120 dB output and are effective over long distances, making them a useful tool for training as well as emergency recall situations.
Checking Fit and Comfort to Prevent Chafing or Slippage
How should handlers check collar fit to prevent chafing and slippage, ensuring safety and consistent training outcomes? Handlers should allow only two fingers between collar and skin, a simple gauge that prevents rubbing and unintended rotation. They should practice collar adjustment techniques before sessions, adjusting for growth or weight loss, and inspecting for wear or fraying that increases slippage risk. What signs indicate discomfort during work, and how should they respond when dogs scratch or try to remove the collar? Use comfort enhancement methods such as padding or adjusters during extended sessions, because softer contact reduces irritation and improves focus. Monitoring behaviors closely throughout training, document fit changes, and replace faulty equipment promptly to maintain safe, consistent outcomes for each training environment in use. For optimal fit, it’s crucial to use a soft tape measure or string for accurate neck measurement, ensuring a snug but not restrictive collar.
Quick-Release and Emergency Removal Features to Know
One critical safety feature on training collars is a reliable quick-release mechanism, which allows rapid detachment in emergencies like entanglement or panic. Users should choose collars with tested quick release mechanisms for emergency readiness, that open in one to three seconds, minimizing harm during sudden distress. What scenarios demand this feature, high-speed chases, river swims, or dense brush navigation, and how quickly must release occur? If a mechanism releases within two seconds, the risk of entanglement injury falls sharply, enabling faster caregiver intervention. Stress free operation matters, can the owner operate the latch under pressure, does the action use simple motion, clear tactile feedback? Assess models with audible clicks or color cues, compare two to four options, also prioritize designs proven in field testing. When selecting a quick-release mechanism, evaluate operation, locking, and stress resistance to ensure it performs reliably under tension and offers easy emergency access.
Recommended Products

Type:Standard Dog Lead Leashes, Dog Size:xSmall, Small, Medium, Large, Model:Nylon Leads - Bulk Packs, Color:Black, Red, Pink, Blue, Green, Yellow, O, Patternname: 100 Leads

The Boss ET-802 two dog system with 1 mile range, large receiver for large dogs 20 pounds and larger with neck size 6 to 22 inches

ALL-IN-ONE HEALTH & GPS TRACKING: Maximize your pet's safety with real-time 4G LTE GPS monitoring. Our smart collar tracks precise location, heart rate, and respiration reference values 24/7. Access comprehensive daily activity logs and biometrics via the app to fully understand your furry friend's baseline health metrics.
Regular Inspection and When to Replace Collars and Tags
Following consideration of quick‑release mechanisms, caretakers should perform regular inspections of collars and tags to guarantee ongoing safety and identification. Inspect weekly, checking for signs of wear, fraying, fading, loose stitching, corrosion on metal, and compromised fastenings, what should be prioritized during routine checks? Replace collars that show structural damage or a loosened fit, because weakened materials increase risk during walks or training. For ID tags, verify legibility of contact information, replacing tags if engraving wears away or paint fades. Consider ideal replacement timing of every 6–12 months, sooner after harsh weather exposure or rough play. Verify compatibility between collar hardware and tag attachments, confirming tags are secure and unlikely to detach during normal activities. Regular maintenance tips include documenting inspections, noting dates, and replacing parts. It’s important to ensure that martingale collars are properly fitted to prevent slipping and escaping while maintaining comfort and safety.
Frequently Asked Questions
Where to Place Dog Tag on Collar?
Place the dog tag on the lowest collar, secured facing outward for easy reading. The owner prioritizes ID tag visibility, performs collar tag maintenance, and recognizes tag placement importance to prevent noise, tangling and loss.
Where Does a Tag Go on a Collar?
Front and center, the tag goes on the outward-facing side of the outermost everyday collar; owners prioritize tag visibility importance, weigh collar material considerations, and use secure tag attachment methods like split rings or rivets.
Are You Supposed to Put a Rabies Tag on Your Collar?
Yes, the owner should affix a rabies tag; rabies tag importance is clear for identification, but tag safety concerns warrant secure placement and regular inspection, and alternative tag options (microchips, ID collars) exist for redundancy.
What Are the Common Mistakes in E-Collar Training?
Common mistakes are, like Icarus flying too high, using excessive stimulation, inconsistent cues, not pairing rewards, abruptly introducing the device, and skipping leash basics; addressing e collar misconceptions improves training collar effectiveness, correcting training errors.
Conclusion
A handler should position identification like a compass on a collar, centered and visible, ensuring quick recognition during training or unexpected encounters and situations. Layer collars by placing rabies and license tags closest to the leather, keeping nameplates outward for readability, and avoiding tag shadows that muffle sound otherwise. Inspect fit weekly, replace cracked plates or loose rivets immediately, and remember an accessible quick-release can save minutes in emergencies and accidents.